How to survive all 30 waves of Tower Defense
Tower Defense gives you a path, a pile of gold, and thirty waves of things that want to walk down it. You win by spending that gold well — five tower types, each good at one job, placed where the path doubles back on itself. Here's what every tower actually does, what's coming at you, and where your money should go.
▸ A full strategy run in motion — the opening spend, the wave-five boss, and not a single life lost. Watch it, then read exactly how below.
The loop is simple. Enemies spawn at one end and march to your base. Every one that reaches it costs you a life — run out of lives and the run is over. Every one you kill pays gold, and gold is the only thing you spend on towers and upgrades. So the real game isn't "shoot the enemies," it's "turn this wave's gold into enough firepower for the next one." Get that economy right and the towers do the rest.
The five towers, and what each is really for
There are exactly five, and they are not interchangeable. Buying the expensive one early is one of the fastest ways to lose.
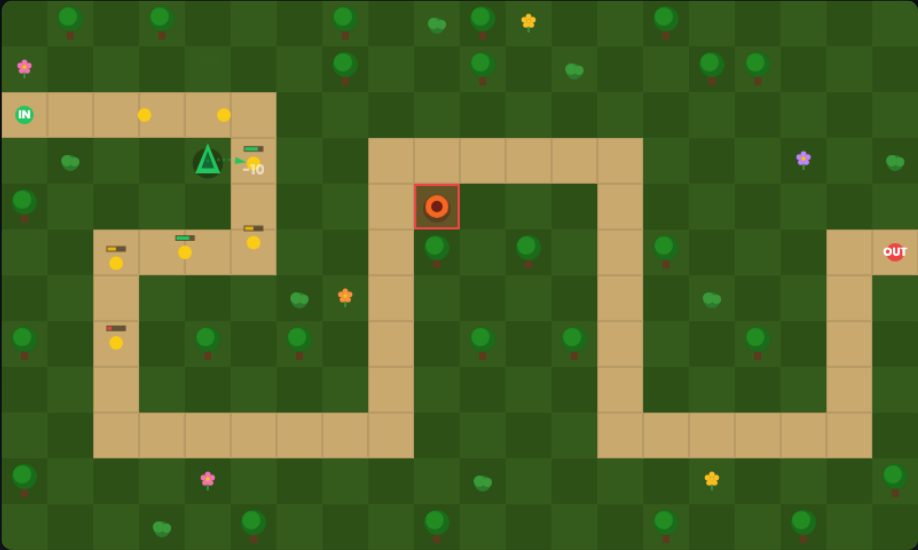
- Arrow (50 gold) — cheap, fast, low damage. This is your whole early game. Arrows won't kill anything tough, but they're efficient, and three of them at a corner out-damage one fancy tower you couldn't really afford. Upgrade the ones you already own before you branch out.
- Cannon (100 gold) — slow to fire, but it hits in a small splash, so everything near the impact takes damage too. Worthless against a single straggler; devastating against a tight column of enemies bunched up on a hairpin turn. Place it where the path packs them together.
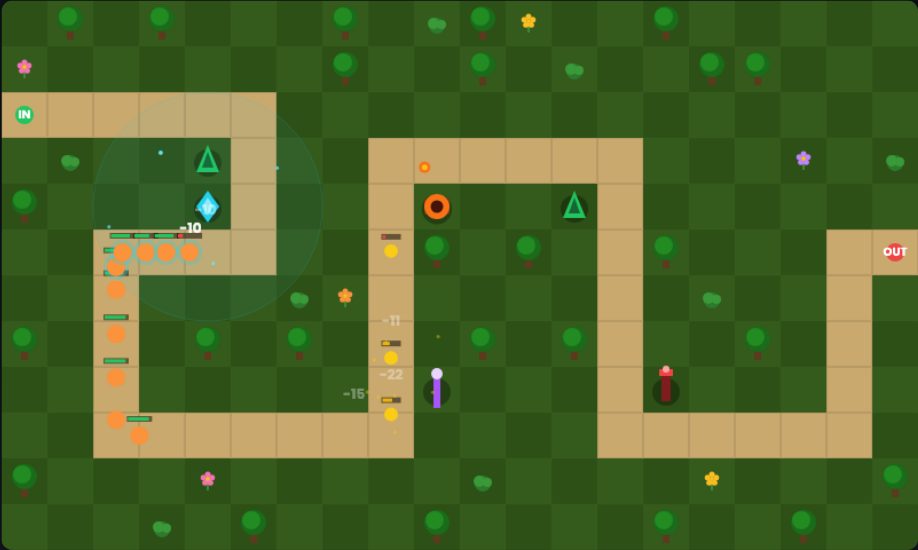
- Ice (75 gold) — does no damage at all. What it does is slow every enemy in range, and that's a force multiplier: a slowed enemy sits in your other towers' range far longer. One Ice tower in front of a cluster of Arrows quietly doubles their work. Think of it as buying your other towers more time.
- Lightning (150 gold) — chains from its target to several nearby enemies at once, so it shreds packs that a single-target tower would only chip at. Strong on maps where enemies travel shoulder to shoulder. The upgrades add more chain jumps.
- Sniper (200 gold) — enormous range, enormous damage, painfully slow reload. By default it ignores the crowd and fires at the strongest enemy on the map, which makes it your dedicated tank- and boss-killer. One well-placed Sniper covers half the map; you rarely need two.
Read the lane: the six things walking at you
Knowing the enemy roster tells you what to build before it arrives, not after it's already half-way to your base.
- Scout — weak and a little quick. Pure fodder; arrows handle it.
- Soldier — the baseline grunt. Tougher than a Scout, nothing special.
- Runner — very little health, but fast — the quickest thing in the game. Runners are how you leak lives when your towers are all aimed at a slow tank elsewhere. Keep something quick-firing near the end of the path for them.
- Tank — slow, heavy, and armoured: it shrugs off a chunk of every hit, so chip damage barely scratches it. Burst it down with the Cannon or Sniper rather than a wall of Arrows.
- Healer — moderate health, but it heals the enemies around it. Let one survive and it quietly undoes your damage all the way down the path. Kill it first — this is exactly what targeting modes are for.
- Boss — a thousand health before wave scaling, armoured, and slow. One arrives every fifth wave, and the late ones come in groups. Everything you build between boss waves is really preparation for the next one.
Targeting is a dial, not a default
Every tower can be set to one of four targeting modes, and leaving them all on the default is leaving damage on the table. The four are Near, Strong, Fast, and First:
- Near shoots whatever's closest — fine, efficient, the sensible default for your cheap Arrows.
- First shoots whatever is furthest along the path, i.e. closest to your base. Set a tower near the end to First and it becomes your last line against leaks — especially Runners.
- Strong always picks the highest-health target. This is the Sniper's home setting, and it's how you make sure your biggest gun is always pointed at the Tank or the Boss instead of a passing Scout.
- Fast prioritises the quickest enemy, which is the cleanest answer to a Runner wave.
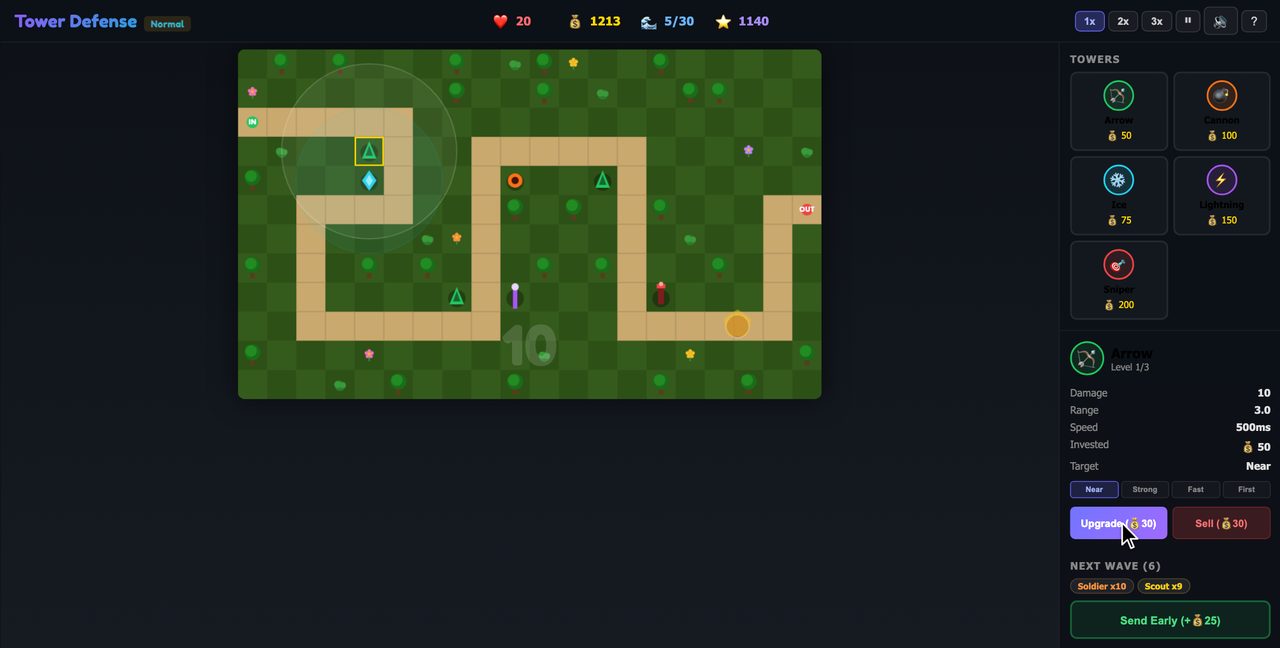
The Healer problem is really a targeting problem: park a tower it has to walk past, set it to focus, and delete the Healer before it can keep the wave alive.
Money management wins games
Your starting gold depends on difficulty, and after that every coin comes from a kill. Two habits separate a wave-10 wipe from a clean run:
- Upgrade before you sprawl. Each tower can be upgraded twice, and an upgrade is almost always more damage per gold than a fresh tower somewhere new. Deepen your strong corners before you spread thin.
- Send waves early when you're ahead. If your defences are comfortably holding, calling the next wave in early pays a gold bonus. Done repeatedly, that snowballs your economy — you build the wave-20 board on wave-14 money. Only do it when you're genuinely safe; the bonus isn't worth a leak.
You can also sell a tower to reclaim some gold and reposition — handy when you realise your Sniper is covering a stretch of empty grass instead of the chokepoint two tiles over.
Play the map you're on
There are three maps, and each one rewards a different opening:
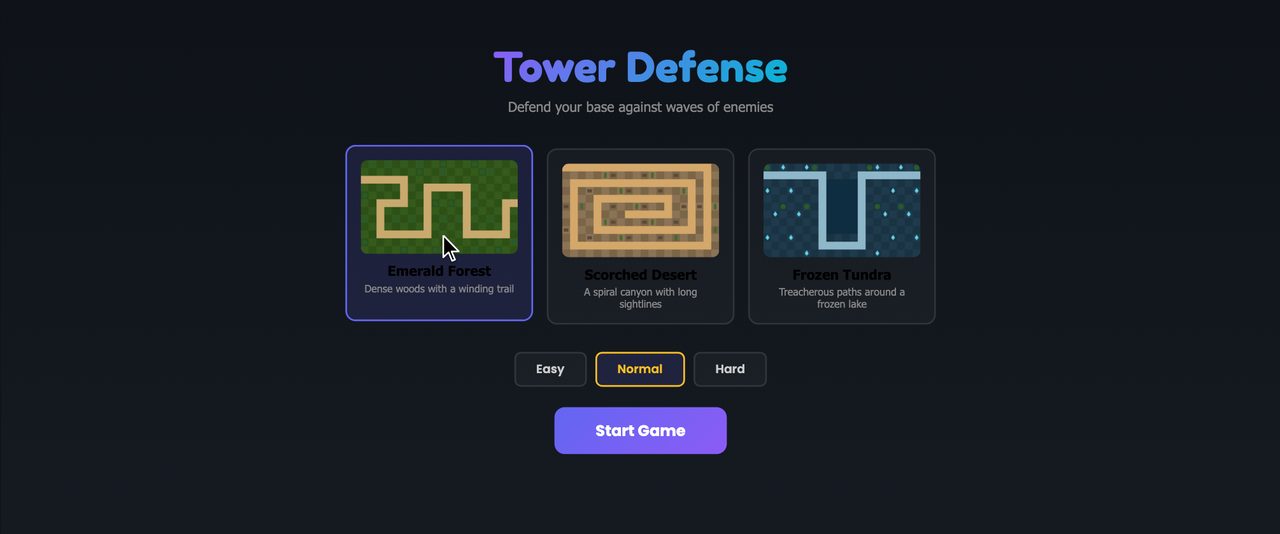
- Emerald Forest — a winding trail through dense woods. All those tight bends bunch enemies together, which is ideal for the Cannon's splash and Lightning's chain. Build into the corners.
- Scorched Desert — a spiral canyon with long, open sightlines. This is Sniper country: a single long-range tower in the middle of the spiral can reach an enormous length of path.
- Frozen Tundra — treacherous paths threading around a frozen lake. Range is limited and the route is awkward, so layered Arrows plus an Ice tower to stretch your firing windows hold up better than a few expensive towers spread out.
Beating the boss
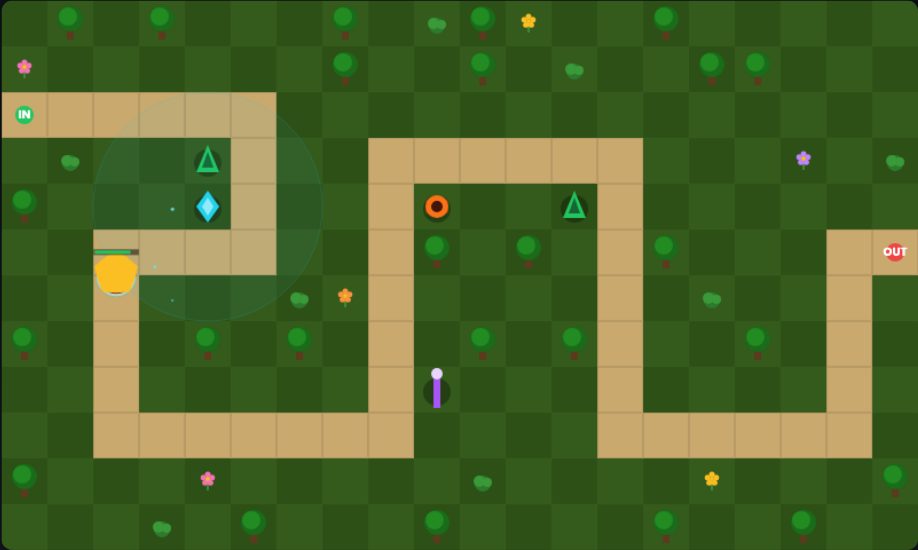
Every fifth wave is a boss wave — a thousand-health armoured Boss (its health climbs with each appearance, and the deepest waves send more than one) marching in with an escort. Armour means raw damage-per-shot matters more than fire rate — a hundred tiny hits get blunted, a few enormous ones don't. Have your upgraded Sniper on Strong so it locks onto the Boss the instant it appears, drop an Ice tower in its path to crawl it through your kill zone, and let the Cannon and Lightning clean up anything escorting it. If you've been banking gold by sending waves early, this is what you were saving for: a last-minute upgrade or two can be the difference between a kill and a single point of health walking into your base.
Pick your pain
Three difficulties change the maths. Easy hands you the most lives and the most starting gold, with slightly weaker, slower enemies — the right place to learn the roster. Normal is the honest version of the game. Hard cuts your lives to a sliver and your starting gold with them, and makes every enemy tougher and faster, so there's no room for a wasted tower; every placement has to earn its spot. Learn the towers on Easy, then go make your gold work on Hard.
That's the whole game: five tools, six threats, four dials, and a gold counter. Read the wave, spend with intent, and aim your biggest gun at the biggest problem.
Added a gameplay video. The board screenshot at the top is now a full run you can watch — picking the game, the opening two-hundred-gold spend, the Ice tower buying time, and the wave-five boss crawling through the kill zone, all without losing a life. The written guide below it goes deeper on the why.
Pictures pass. The guide now has five fresh in-game captures — the map-select screen, an opening Arrow-and-Cannon spend, a wave strung out through an Ice tower's slow field, the full sidebar with the targeting dial, and the Boss crawling toward its doom — every one taken from a real run on Emerald Forest at Normal difficulty. While we were at it we corrected the enemy notes: bosses arrive every fifth wave, not just at the finale — and the deep ones bring friends.
Guide published. We also gave Tower Defense's interface a tune-up the same week: the heads-up display (gold, lives, wave counter) now refreshes the instant anything changes, and the whole game sits in the same play-area frame as the rest of the arcade. Future balance notes and map tips will be logged here, newest first.